How To Start Your Own Blog
A FREE BEGINNERS GUIDE & STEP BY STEP TUTORIAL

There are so many blogs in the world today. This is mostly due to everyone's access to the internet, as well as the varied experiences and points of view that bloggers want to share with their readers. When it comes to starting a "Make Money Blog," there are many pros and cons. This article will take an in-depth look at ...
Read More
DIY blogs have mushroomed all over the internet thanks to an increasing number of people who prefer the art of “doing it yourself” instead of buying something premade. You see, creating something from scratch is enjoyable. Besides, one gets a sense of joy after completing their project. However, not everyone is gifted enough to know how to start and finish ...
Read More
One is that not everyone can afford to pay for a car outright, and hence people are often looking for flexible payment plans that will enable them to pay for a car without breaking the bank. With a car financing blog, your readers will look to you for information on how they can spread out their payments for their cars in favorable installments.
Read MoreSo you want to start your own blog, but your not sure how to go about it? Well, you have come to the right place.
Starting a blog is actually a lot easier than most people realize, this tutorial will take you through the process from start to finish, and less than 1 hour from now, you will have your very own blog up and running.
Whether you are setting up your blog as a hobby, for a business or as a way of generating some extra income, the setup process is exactly the same. Then once you have your basic blog setup, you can choose from thousands of prebuilt themes and templates to style your blog the way you want it.
So let’s get right to it.
In order for your blog to function properly, there are 3 things you will need to do:
If those things sound a bit scary, or too technical, don’t worry, it’s really very simple and I am going to show you every single step.
I promise that if you stick with me through this, you will be shocked at just how easy it is.
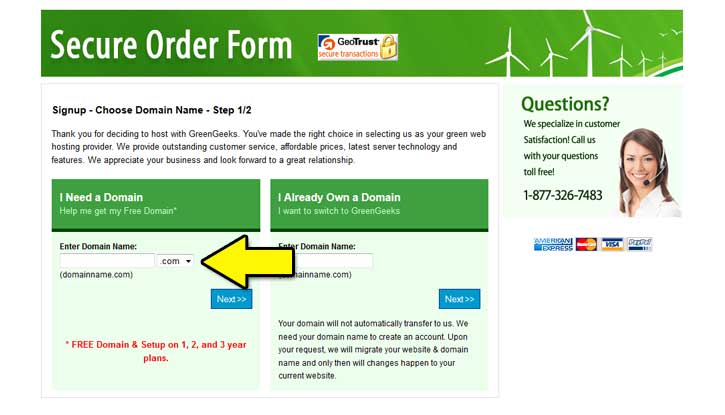
Every website or blog on the internet requires a domain name, it acts as your address, so people can find your blog by typing your domain name into their internet browser.
So you will need to find something that you like and make sure it is available (that nobody else has already registered it).
Depending on the type of blog you are planning to start, you may want to use your own name as a domain, (like PaulStewart.com) or some descriptive words to tell your readers what your blog is about, (like KatesCookingBlog.com) or something like that.
You will also need to decide if you want to use a .com, .net or .org extension. You can choose whichever you want, but most people try to stick with .com or .net.
Once you have found a domain name that you like, write it down somewhere, so you don’t forget it and move on to the next step, where I will show you how to get your domain for free.
Ok, now that you have chosen a domain name, you will need to setup an account with a web hosting company who will house your blog and make it available on the internet 24/7 for the whole world to see.
There are a lot of good companies offering web hosting, and for a small blog like the one we are setting up here, you will only need a relatively small account which will cost around $5 to $15 per month.
I personally recommend a company called GreenGeeks. They are an American company based in California and have great server speed and uptimes. And perhaps most importantly, they are super easy to use and offer great support in case you every need it.
To get your account setup with GreenGeeks click this link and you should see a screen that looks something like this:
Click on the Sign Up Now button and you should see something like this:
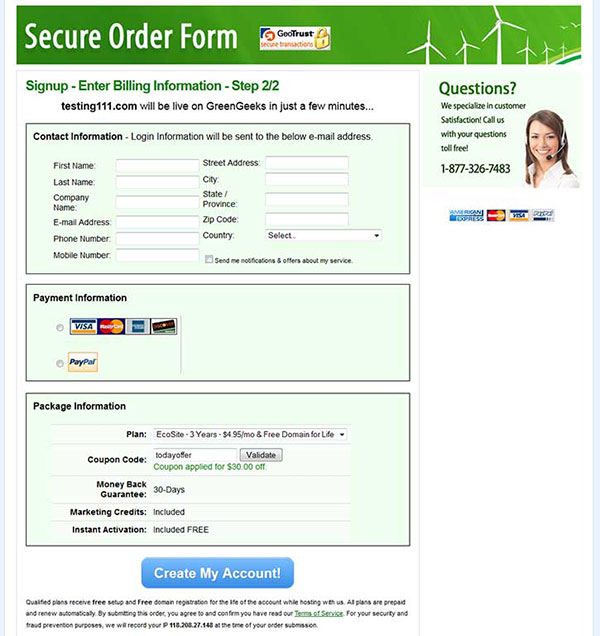
Simply fill out your information and choose a plan that suits you. A discount code will already be loaded in and you will see that the longer you sign up for, the cheaper the hosting gets.
I usually sign up for a year or two at a time, so that I don’t have to worry about paying the bill every month. Plus it works out way cheaper that way.
Once you have filled out this form, just click the “Create My Account” button and you will receive a confirmation email with all your login details.
There are many ways you can build your actual blog, there is software you can buy and there are also free scripts that you can use.
WordPress is a free blogging script that is currently being used by millions of websites around the world.
It is by far the most popular option and is easy to use and fully customizable. (This blog is built on wordpress).
WordPress also allows you to utilize thousands of free pre-designed themes, which you can use to change the look and feel of your blog with just a few clicks, meaning that you don’t have to spend your money hiring expensive web designers to get your blog looking great.
Manually installing WordPress on your website can be a bit difficult, which is another reason I use and recommend GreenGeeks.
They have set their servers up so it is super easy to install WordPress with just a few clicks, so let’s get it done.
In your welcome email from GreenGeeks, you will have a link to your Customer Login page, which will look like this:
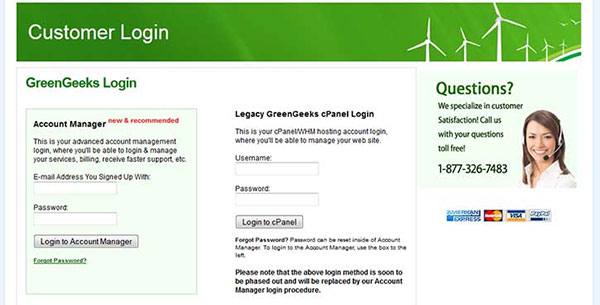
Just enter your email and password (supplied in the GreenGeeks email) and click “Login to Account Manager”.
Once you are inside, you will see the screen below, which shows you your current account.
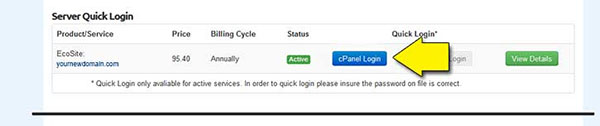

There are a lot of options on this page, you can setup email accounts, check your traffic stats and a heap of other things, but for now we are going to focus on setting up your blog, so scroll down until you see the WordPress icon and click on it.
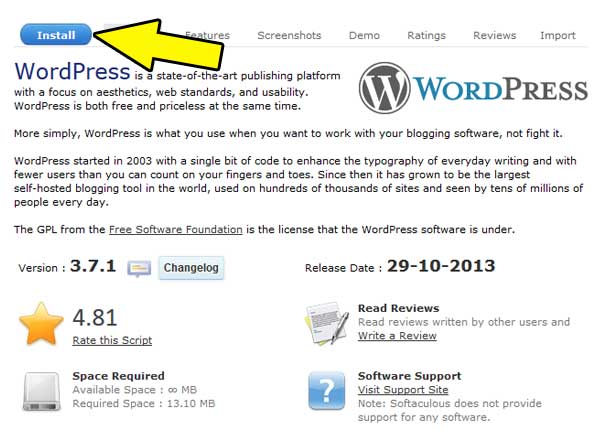
Next you will see a screen with some information about WordPress, just click on the Install tab at the top.
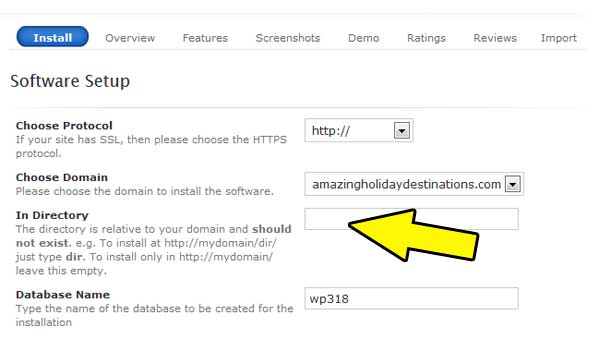
The first two options “Choose Protocol” & “Choose Domain” will be preset, so you can just skip them and leave then as they are.
The “In Directory” option, is where you can choose to install your blog into a secondary directory if you want to.
If you are happy to install your blog on the root domain, simple leave this section blank.
If you don’t understand what that means, don’t worry, just make sure the “In Directory” input box is blank. (if there is anything in it, just delete it).There may be a few other options, but you can just leave them as they are.
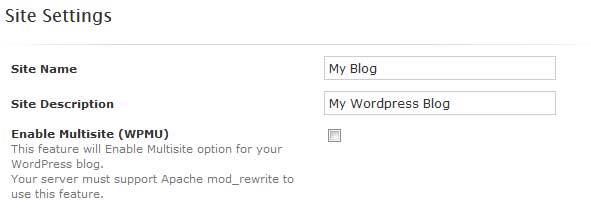
The next one you do need to fill in is the Site Name: (just enter the name of your blog) and a Site Description (enter a slogan or descriptive sentence if you have one, or just leave it blank).
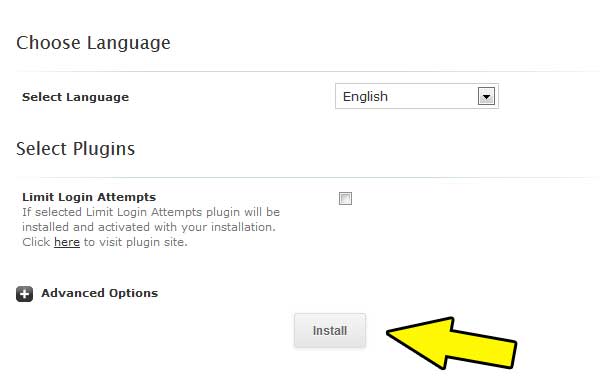
Leave the “Enable Multisite (WPMU)” option un-ticked.The next section will ask you for a username, password and admin email. These are the logins you will use to manager your blog, so choose something you will remember, and write it down somewhere.Once you have done that, just click on the Install Button at the bottom:
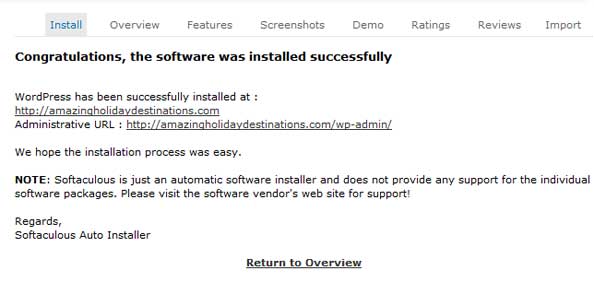
Congratulations, you have just successfully setup your very own blog.
At the moment it will just be a very basic blog using the default WordPress theme, but I will show you how to change that in a minute.
For now, check out your new blog, type your domain name into your browser and make sure it works and looks something like this:
OK so lets have a look at how to manage your blog. First you’ll need to log in to the back end of your blog, to do this, add the follow text to your domain name: /wp-login/ log into the site using the user/pass you just put up.
For example: www.yourblogname.com/wp-login/
You can also login with the “login” link on your default blog page.
Once you have access, you will see your dashboard, which is where you will manage your blog from:
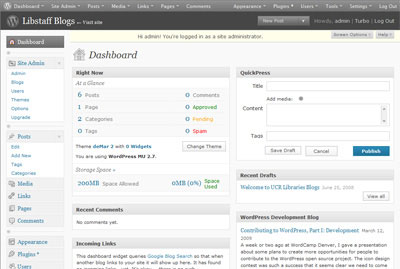
On the left hand side you will see your quick-links to pages, posts, tags, comments and category and change your WordPress theme.
Now will be the time to become familiar with the Dashboard as this is how you control your site.
You will see all the sub-menus on the left hand side of the screen. While they all play an important role, it isn’t something you have to learn fully straight away. The first thing to spend you time on is familiarizing your self with the menu’s below.
Here is a brief description for you to help keep it simple.
Posts
This is what you will use to “post’ on your blog. When you create posts inside WordPress, you can choose the page they’ll be displayed on, the date you publish them, the name of the publisher, and the option to give your blog visitors the ability to post comment on your posts. You will also be able to set up diverse post categories.
Media
The media menu allows you to manage your videos and pictures that you place on your blog.
Links
In the link section, you can generate a variety of different links and link categories you can use later on to create customized sidebar widgets.
Pages
you’ll use this to add fresh new pages to your blog. You can browse the different options available; enabling/disabling comments, page slug, altering page order, adjusting the page template etc.
Appearance
The appearance section allows you to customize the way you blog will look, beginning with the theme you have chosen, to the menus and sidebar widgets. There are lots of ways to customize your blogs appearance, so have a play around; you’ll be very pleased with what you can do.
Plugins
Plugins are useful tools if they are applied correctly. There are lots of different third party plugins out there that will allow you to speed the performance of your blog, boost visibility of the website on search engines, improve the visual style and look, etc.
Users
This part is for the addition or modification of the existing user settings like profiles, passwords, emails, etc.
Settings
The setting menu allows you to set up things like your blog name, media settings, the front page display, the date format, and the descriptions. From the settings menu, you can also reconfigure any third party plugins you install.
Follow the steps above and you will have your blog set up and running in no time at all. You can then start your blog right now by adding your very own content and posts. You can also give more thought to the theme that you may wish to install if you don’t want to use the default theme. If after you’ve gone through the 5 steps you feel you still need more just send us a message through the contact us page and we’ll be very pleased to point you in the right direction.